Learn how to paint a room with practical steps for preparation, tools, paint order, drying, cleanup, safety, and deciding when to hire a professional.
.
A fresh coat of paint can change a room, but the smoothest results usually come from the work done before the roller touches the wall. Clear the space, protect floors and furniture, repair visible damage, and give the surface time to dry after cleaning. Those steps help prevent uneven coverage, peeling, and paint on places it does not belong.
To learn how to paint a room, plan the project first, prepare the walls carefully, use the right brush and roller. Apply paint in a consistent order, and allow each coat to dry according to the product label. If the room has extensive drywall damage, moisture problems, difficult access, or potential lead-based paint, professional guidance can make the work safer and more manageable.
Preparation also means knowing what you are working with. In homes built before 1978, the EPA recommends treating existing paint as lead-based unless an inspection shows otherwise. Start by assessing the room, its surfaces, and any safety concerns before gathering supplies and setting up your work area.
What to Do Before Painting a Room
Good painting starts before the first roller is loaded. Walk through the room, decide what needs protection or repair, and check the wall condition in strong daylight. Test color samples in the room if you are still choosing a shade, since lighting can change how a color appears. Plan where furniture, tools, and wet paint will go so you are not working around obstacles.
Protect the room and prepare the surface
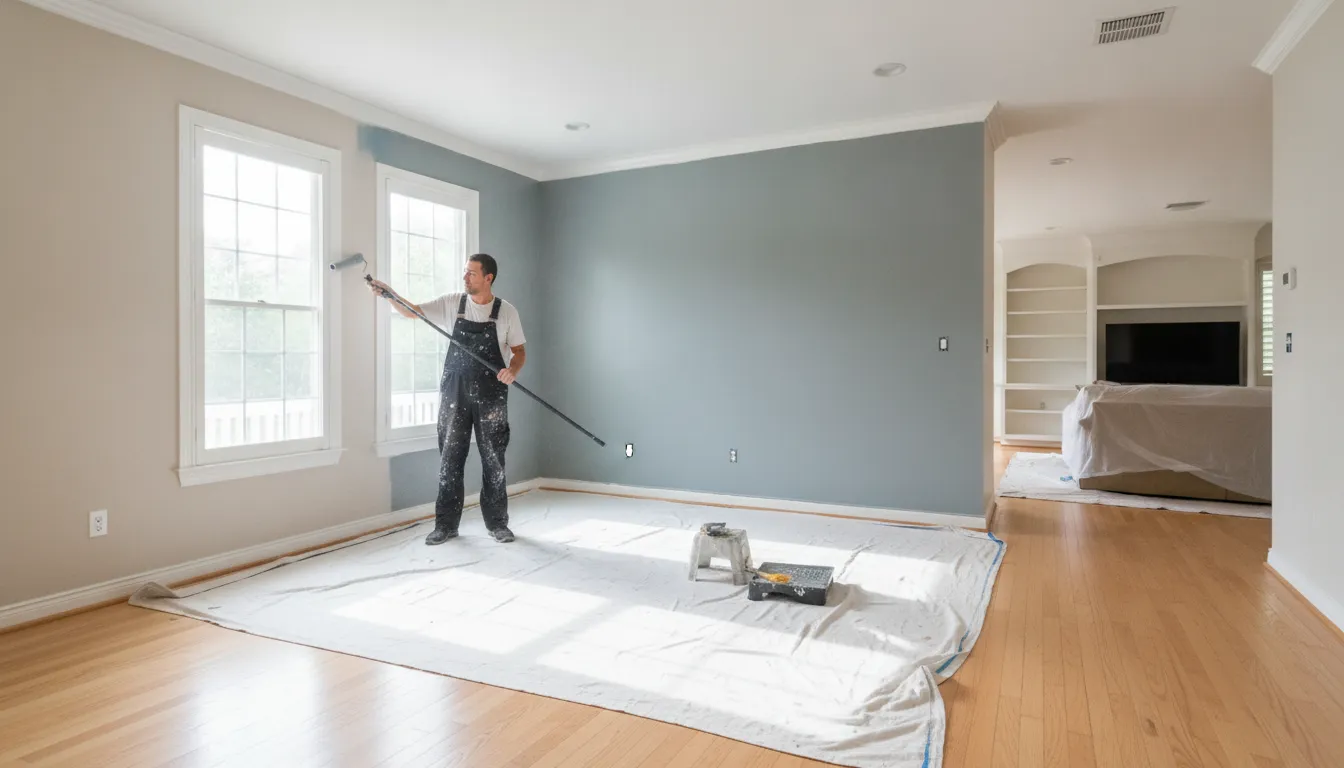
Move furniture out when possible. Cover anything that remains, along with the floor, using durable drop cloths or protective sheeting. Use barriers to keep dust in the immediate work area, especially if sanding or scraping is necessary. Remove switch plates and outlet covers carefully, and keep the screws together. Painter's tape can protect trim, door frames, and windows, but it works best on clean, dry surfaces.
Clean before you repair. Vacuum dust from baseboards and moldings, then wipe the walls with a damp rag or sponge, working from the top downward. Let the surface dry. Fill small holes and dents with spackling compound, allow the repair to dry, and sand it smooth. Remove sanding dust before painting. Larger cracks, loose material, recurring stains, or damaged drywall may need a more thorough repair rather than a quick cosmetic patch.
Use the product label or technical data sheet to confirm any preparation and safety requirements for the materials you choose. If stains or a porous surface could affect the finish, determine whether primer is appropriate for that condition instead of assuming paint alone will solve it.
Check for lead, asbestos, and moisture risks
Do not sand or scrape an unknown older coating casually. The EPA advises treating paint in a home built before 1978 as lead-based unless an inspection shows otherwise. A certified lead inspector or risk assessor can test relevant surfaces. If lead-based paint may be present, use lead-safe practices or hire a lead-safe certified contractor for covered renovation work. Keep the area contained, minimize dust, and protect occupants from debris.
Stop and get qualified advice if the project could disturb asbestos-containing material. Also address leaks, dampness, or visible moisture damage before painting. The EPA recommends drying damaged areas within 24 to 48 hours to help prevent mold growth. Ventilate the work area as appropriate, and follow the safety instructions for every product. Sources: EPA remodeling guidance and EPA lead-safe renovation guidance.
What Tools and Supplies Do You Need to Paint a Room?
Gather everything before opening the paint can. A short supply check prevents interruptions, protects the room, and makes it easier to keep a wet edge while you work.
Application tools
- Angled sash brush: A 2 to 2 1/2-inch angled brush helps you cut in neatly along corners, trim, ceilings, doors, and other edges.
- Roller frame and covers: Use a roller for broad wall areas. Choose a cover suited to the wall texture and the paint manufacturer's instructions.
- Extension pole: An extension pole gives you better reach and can make large walls more comfortable to roll. Use a stable ladder or stepladder when needed, rather than stretching.
- Paint tray and liner: A tray holds paint for the roller, while a liner simplifies cleanup. Keep a stir stick nearby so the paint can be mixed as directed.
A basic room-painting supply list commonly includes a brush, roller and frame, extension pole, tray, tray liner, rags, and drop cloths. Behr's room-painting guide lists these items among its recommended supplies.
Prep and protection supplies
- Drop cloths and plastic sheeting: Cover floors and furniture before painting. Move furniture away from the walls when possible, then cover what remains.
- Painter's tape: Use tape around trim, doorways, windows, switches, and outlets where a clean edge is important. Press it down firmly to reduce paint seepage.
- Spackle, putty knife, and sandpaper: Fill small holes and dents with spackle, smooth it with the putty knife, let it dry, then lightly sand. Medium-grit 220-grit sandpaper or a sanding sponge is commonly used for repaired areas.
- Rags and cleaning materials: Keep damp and dry rags available for wiping dust, cleaning surfaces, and catching small drips before they dry.
You may also need primer for stains, repairs, or porous new drywall. Wear the protective equipment called for on the product label, and read the paint's safety data sheet before starting so you understand the required precautions.
- Angled brush
- Purpose: Cut in along corners, trim, and other edges.
- Roller and frame
- Purpose: Cover broad wall areas with even passes.
- Drop cloths and tape
- Purpose: Protect floors, furniture, trim, and openings.
- Spackle and sandpaper
- Purpose: Repair and smooth small wall defects.
- Rags and cleaning supplies
- Purpose: Remove dust and catch small drips.
How to Paint a Room in the Right Order
A consistent sequence keeps wet paint from being disturbed and makes it easier to maintain clean transitions between surfaces. Work from overhead areas toward the floor, then move from detailed brushwork to broad roller coverage. The exact order below follows the preparation-first approach described by Benjamin Moore, including ceiling, trim, walls, drying, and a second coat: room-painting sequence guidance.
- Plan and prepare the room. Choose the color and finish, gather your supplies, move or cover furniture, protect the floor, and remove or cover switch plates and outlet covers. Clean the surfaces and complete repairs before opening the paint. Fill small holes, allow the repair material to dry, sand it smooth, and remove the dust. If the home was built before 1978, pause to address possible lead paint before sanding or scraping.
- Paint the ceiling first. Start with the surface overhead so drips or roller splatter do not damage finished walls or trim. Use a brush to cut in around the ceiling perimeter, then roll the remaining area in manageable sections. Keep a steady wet edge so adjoining passes blend while the paint is still workable.
- Paint the trim and baseboards. Brush door and window trim, casings, and baseboards before painting the walls. This order lets you work carefully on narrow edges, then cover minor wall-edge marks during the wall stage. Allow the trim to dry according to the product label before masking or working close to it.
- Cut in the walls. Use an angled brush to apply a controlled band of paint where walls meet the ceiling, trim, corners, and other fixed edges. Work in sections rather than cutting in the entire room hours before rolling. Keeping the brushed edge reasonably wet helps the rolled paint merge with it.
- Roll the walls. Load the roller evenly and work in overlapping sections, using consistent pressure. Blend each new section into the previous one before it dries. Check the wall from different angles for missed areas, runs, or visible roller edges, but avoid repeatedly brushing or rolling paint that has begun to set.
- Let the first coat dry completely. Do not judge the final color or coverage while the surface is still wet. Drying time depends on the product and conditions, so check the paint can or technical data sheet rather than relying on a fixed number of hours. Keep the room ventilated as appropriate for the product.
- Apply the second coat if needed. Once the first coat is fully dry, repeat the cut-in and rolling process. The number of coats depends on the color and surface, so follow the product directions and inspect coverage under the room's normal lighting.
Behr's room-painting guidance also lists the basic tools for this workflow, including an angled brush, roller and frame, extension pole, tray, rags, and drop cloths: painting tools and preparation guidance.
How to Avoid Common Room-Painting Mistakes
A smooth finish depends as much on what you do before and between coats as on the painting itself. Avoid these common problems to keep the work cleaner and prevent avoidable touch-ups.
Do not rush surface preparation
Paint will not hide loose material, grease, moisture damage, or uneven repairs for long. Clean dusty walls and baseboards, fill small defects, allow repairs to dry, then sand lightly and remove the dust. If a wall has ongoing moisture, fix the source before painting. The EPA advises drying moisture-damaged areas and items within 24 to 48 hours to help prevent mold growth. Review the EPA's remodeling guidance before covering a damaged surface.
Take extra care in older homes. Unless an inspection shows otherwise, the EPA recommends treating paint in homes built before 1978 as if it contains lead. Do not casually sand or scrape suspect paint. Use lead-safe practices and seek qualified guidance when the project could disturb lead paint, asbestos, or contaminated material.
Use the roller and brush correctly
Overloading a roller creates drips, spatters, and uneven coverage. Load it evenly, then work in manageable sections without pressing hard. Keep a wet edge as you move across the wall so one area does not begin drying before the next overlaps it. Likewise, do not cut in an entire room hours before rolling. Work along a section, then roll near that edge while the paint is still workable.
Do not guess about drying time
Temperature, humidity, airflow, color, and surface condition can affect how paint behaves. Follow the can label or technical data sheet rather than relying on touch alone. Apply the next coat only after the first has dried completely. The number of coats can vary by color and surface, so thin coverage is not automatically a reason to rush another coat.
Ventilate and address unsafe conditions
Keep suitable outdoor-air ventilation moving through the work area, and use exhaust ventilation when appropriate. The EPA notes that exhaust ventilation can help remove contaminants. Stop and reassess if the room has strong odors, poor airflow, active dampness, or a surface that may contain hazardous material. Safe preparation is part of learning how to paint a room well, not an optional cleanup step.
When Should You Hire a Professional Painter?
DIY painting can work well when the room is small, the walls are in good condition, and you have time for careful preparation. Professional help becomes worthwhile when the project involves more than applying color. A large room, multiple surfaces, extensive patching, high walls, stairwells, or difficult trim can make the work slower and harder to finish cleanly. If you need consistent coverage, sharp lines, and a surface that looks properly prepared, an experienced painter can manage the preparation as well as the paint.
Get help with repairs and difficult areas
Paint will not hide loose drywall, deep dents, uneven patches, stains, or texture problems. AllFix handyman services include drywall patches, full panel replacement, texture matching, and preparation for paint. That combination can be useful when the job requires wall repair before the first coat. High ceilings, tight corners, stairways, and rooms with substantial furniture also add physical demands and increase the chance of drips, missed areas, or uneven edges.
Finish expectations matter, too. A color change, finish match, or turnover may call for more care than simply applying paint. Thorough preparation and clean lines can matter as much as the final color. Discuss the wall condition, desired finish, and scope before work begins rather than assuming paint alone will solve every surface issue.
Do not disturb uncertain materials
Safety concerns are a clear reason to pause and ask for qualified guidance. The EPA advises treating paint in homes built before 1978 as lead-based unless an inspection shows otherwise. It recommends lead-safe practices and, for relevant renovation work, hiring a lead-safe certified contractor. If work could disturb asbestos-containing material, the EPA advises using an asbestos professional or contacting the health department before proceeding. Moisture damage also needs attention before painting. Wet or damaged areas should be addressed and dried rather than sealed under a new coating.
Consider the project timeline
Landlords and property managers may prefer professional help when a turnover requires wall repairs, painting, and other maintenance in a coordinated window. Homeowners planning a broader update can also consider painting during a room remodel. For a single room or a larger property-maintenance scope, review professional interior painting help from AllFix, serving Grant County, Adams County, and Spokane County in Washington.
How to Clean Up After Painting a Room
Clean up methodically while the work is fresh. Remove painter's tape carefully, pulling it back over itself at a low angle rather than snapping it away from the wall. If an edge has begun to dry, score it lightly first so the tape does not lift the new finish. Wipe wet drips promptly with a damp cloth, as recommended by Behr, instead of allowing them to harden.
Wash water-based brushes, roller covers, trays, and other reusable tools according to the paint label and product instructions. Do not guess at cleaning methods or drying times. The label or technical data sheet is the right source for product-specific guidance. Keep the room ventilated during cleanup and drying. Exhaust ventilation can help remove contaminants from the work area, according to the EPA. See the EPA remodeling guidance for broader indoor-air precautions.
Leave switch plates and outlet covers off until the wall is fully dry. Reinstalling them too soon can mark the finish or trap moisture at the edges. Dispose of paint materials and debris according to the product label and local requirements. For projects involving older paint, cleanup deserves extra care: the EPA lead-safe checklist emphasizes minimizing dust, controlling waste, cleaning the work area, and cleaning once more.
Before putting the room back together, inspect the walls in normal daylight. Save a small, clearly identified amount of leftover paint for future touch-ups, and note the room, wall, finish, and application date. Touch up only after the surface is dry, using the same paint and application method when possible. If the project includes extensive repairs or you want professional interior painting help, a qualified local contractor can handle the finishing work and cleanup.
Frequently Asked Questions
What is the correct order to paint a room?
Prepare and clean the room first, repair and sand damaged areas, then paint the ceiling, trim, and walls. Let each coat dry according to the paint label before applying another coat. This order helps keep drips and edge work from marking surfaces you already finished. (Source: Benjamin Moore room-painting sequence.)
How do I prepare a room for painting?
Move or cover furniture, protect the floor, remove or cover switch plates and outlets, and use painter's tape around openings. Clean the walls, fill small holes, sand repairs smooth, and prime where needed. If the home was built before 1978, treat existing paint as potentially lead-based unless testing shows otherwise. (Source: EPA remodeling guidance.)
Can you paint an entire room in one day?
Sometimes, but it depends on the room size, surface condition, number of coats, and the product's drying requirements. Do not apply a second coat until the first has dried completely. Check the paint can or technical data sheet rather than relying on a fixed schedule.
When should I hire a professional painter?
Consider professional help when walls need extensive repair or the room has high or difficult-to-reach areas. Professional help also makes sense for a pre-1978 home, possible asbestos, or a finish you want without managing all the preparation. AllFix provides interior painting and drywall preparation for homeowners, landlords, and property managers in Grant County, Adams County, and Spokane County, Washington.
Ready to get help painting your room?
Professional help can make sense when a room needs substantial prep, repairs, or a clean, consistent finish. To request a free estimate for interior painting or related room repair, contact AllFix through the online form or call (509) 761-4778. Share the room details and the work you would like completed so the next step is clear.
Tell Us About Your Project
Fill out the form below and we'll contact you within 1 business day.