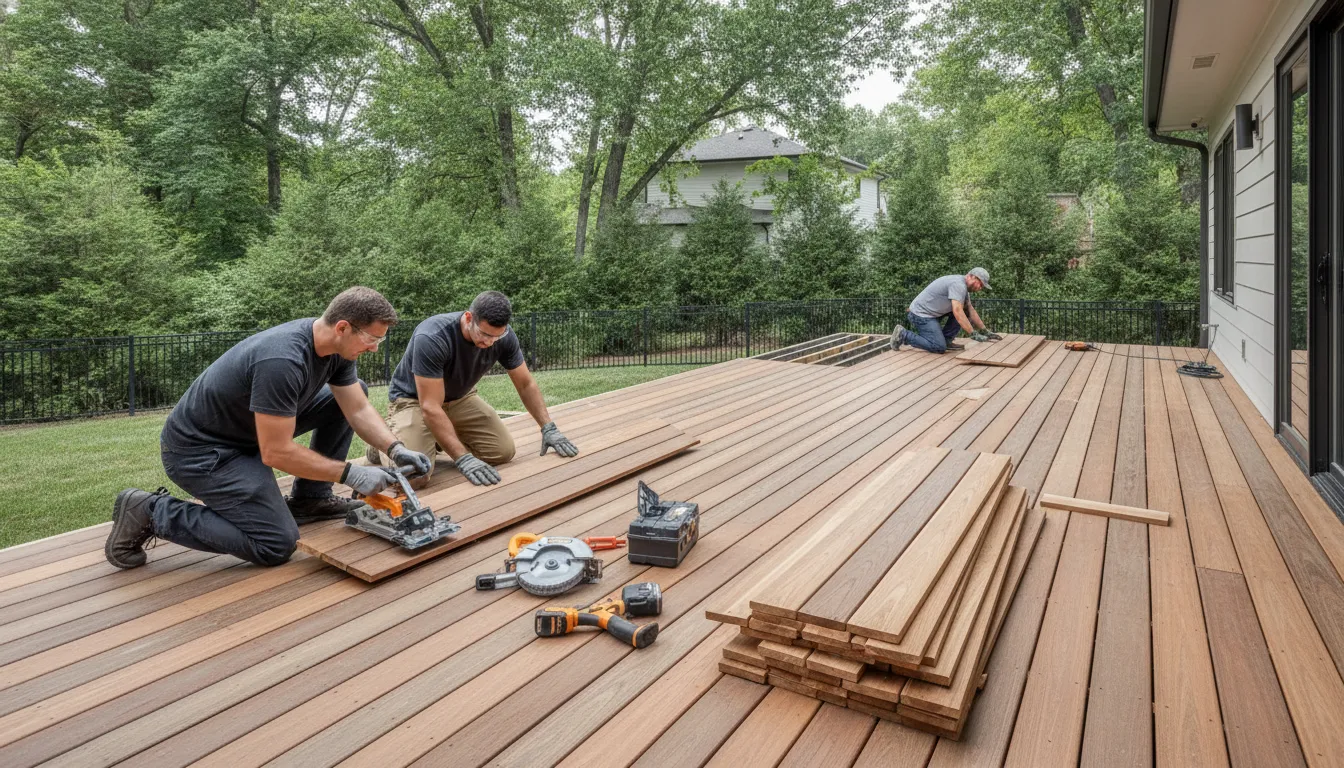
Learn how to replace deck boards safely with this step-by-step guide. Get practical tips for inspection, removal, measuring, and installing new boards.
A weathered deck does not always need a full replacement. Sometimes, only a few boards have deteriorated while the joists and beams remain strong. In those cases, replacing the damaged pieces can restore a safer walking surface without disturbing the entire structure. Before learning how to replace deck boards, inspect the damage carefully. Look for soft wood, deep cracks, loose fasteners, water collection, and movement beneath your feet. You will also need the right lumber, tools, safety equipment, and outdoor-rated hardware. This guide walks through the process and explains when a professional repair is the better choice.
Key Takeaways
- Inspect before replacing anything: Check boards, fasteners, stairs, railings, joists, beams, posts, and ledger connections for rot, movement, cracks, moisture damage, and pest activity.
- Match the repair to the decking system: Measure each opening, support board ends and butt joints, maintain proper drainage gaps, and use fasteners approved for wood or composite materials.
- Know when to call a professional: Localized board damage may need a simple replacement, but unstable framing, widespread rot, loose railings, or ledger problems require a broader repair assessment from AllFix.
How Do You Know When to Replace Deck Boards?
Deck boards can look weathered long before they become unsafe, so color alone is not enough. Inspect the surface, fasteners, stairs, railings, and framing, especially near downspouts, planters, and board ends, where moisture often collects.
Check for rot, cracks, and moisture damage
Press questionable areas with a flat-head screwdriver. Sound wood should feel firm; rotten wood may feel soft, crumble, or let the screwdriver sink in. According to Decks.com’s deck board repair guidance, wood that feels soft or gives way during inspection may be rotten and should be replaced. Do not cover deteriorated boards with stain or paint. A finish can change the appearance, but it cannot restore the wood’s strength.
Look for deep splits, raised splinters, severe warping, or cupping; a badly cupped board may create a trip hazard. Wear gloves and avoid walking barefoot on older decking. If several boards are warped in one area, inspect the framing and drainage.
Look for mold, pests, and loose fasteners
A section that stays wet after the rest has dried may be trapping water. Small holes or sawdust-like debris can signal pests. Identify the cause before replacing a board, or the new decking may develop the same damage. Raised nails or screws can catch shoes, and rusted fasteners lose holding strength; replace them with hardware rated for outdoor decking.
Distinguish fading from structural damage
Gray, faded boards may still be structurally sound. If the wood remains solid, cleaning, light sanding, and a compatible finish may be enough.
Choose between board replacement and larger repairs
Replace individual boards when damage is localized and the framing feels firm. Larger repairs may be necessary when several boards are soft, joists are rotten, or the deck shifts underfoot. Stop the project and seek professional help if stairs, railings, or the deck itself move under normal pressure.
Replacing damaged boards early can help prevent larger repairs or a full deck rebuild. If you are unsure what you find, AllFix can assess deck damage and recommend practical repairs for properties in Grant, Adams, and Spokane Counties, including Moses Lake, Ephrata, Quincy, Othello, Soap Lake, and Warden.
What Tools and Materials Do You Need?
Before shopping, identify the existing decking material, board dimensions, and fastener type. If you find widespread rot, unstable framing, ledger damage, or problems with the stairs and railings, stop before removing more boards. AllFix’s handyman services can help homeowners, landlords, and property managers with deck repairs in Grant, Adams, and Spokane Counties.
- Safety gear: Safety glasses, work gloves, hearing protection, and closed-toe, slip-resistant shoes. If you cut pressure-treated lumber, work outdoors and follow the product’s safety instructions.
- Removal tools: A pry bar, cat’s paw, hammer, nail puller, and a drill or impact driver with the correct bit for each screw head.
- Measuring tools: Tape measure, pencil, chalk line, level, and speed square.
- Saws: A circular or miter saw with a sharp blade designed for the material. Composite decking may require a specific blade, so follow the manufacturer’s instructions. Never reach beneath a moving saw.
- Replacement boards: Pressure-treated wood or composite decking that matches the existing material, thickness, width, and appearance. A composite board from another product line may not fit existing clips.
- Fasteners: Corrosion-resistant deck screws approved for the treated lumber, or the clips and screws the composite manufacturer specifies. Do not replace specified hardware with ordinary wood screws.
- Extras: Pilot bits, spacers, end-grain sealer, joist tape, tarps, and a sturdy debris container.
Clear the deck and keep children and pets away from the work zone. If the deck needs more than isolated board replacement, AllFix also offers remodeling services for larger outdoor and home improvement projects.
How Do You Inspect Deck Framing?
Replacing damaged boards only addresses the visible surface. The frame includes the joists, beams, posts, rim joists, ledger, blocking, and structural fasteners, and damage in any of these areas can cause bouncing, sagging, water intrusion, or premature failure. Pay close attention to the ledger connection, where an attached deck meets the house.
Check joists, beams, posts, and the ledger
Examine every visible framing member for cracks, splits, rot, insect damage, and movement. At the ledger, look for dark staining, swollen wood, missing hardware, or gaps between the ledger and the house. Check post bases for standing water, soil contact, and decay. Gently probe questionable areas with a screwdriver or awl; if the tool sinks in or exposes a damp, crumbly interior, the framing may have rot.
Look for drainage problems and damaged joist tops
Check whether debris or tightly spaced boards trap water. After removing decking, inspect joist tops for soft sections, splits, or uneven surfaces. If drainage is the underlying problem, replacing the damaged wood alone may not prevent the same issue from returning.
Confirm spacing, support, blocking, and hardware
Bowed, twisted, or widely spaced joists can cause boards to flex or crack. Confirm each joist bears properly on an approved support and that butt joints rest on blocking rather than hang between joists. Inspect bolts, hangers, and post bases for rust or looseness, and do not remove critical structural hardware without understanding how the load is supported.
Stop if you find movement, ledger damage, or widespread rot
Stop the project if the deck shifts when you walk across it, pulls away from the house, sags noticeably, or has damaged posts and beams. Widespread rot, serious insect damage, and a compromised ledger connection also require professional evaluation. Keep everyone off an unstable deck until the cause is understood. New boards cannot correct a failing support system.
Know when to call AllFix for Grant, Adams, and Spokane County deck repairs
Professional help is sensible when the deck is elevated, attached to the home, or damaged in several framing areas. AllFix serves homeowners, landlords, and property managers in Moses Lake, Ephrata, Quincy, Othello, Soap Lake, Warden, and other communities across Grant, Adams, and Spokane Counties. Its handyman services can address many deck repair needs, while its remodeling services may be a better fit for larger exterior projects. Review the company’s service areas to find local service information before ordering materials or starting work.
How Do You Remove Old Deck Boards Safely?
Weathered wood can break unexpectedly. Put on protective equipment and work slowly around stairs, railings, siding, flashing, posts, and electrical equipment. Never stand on boards that feel soft, cracked, or loose.
- Identify the fasteners. Look for screws and nails. Composite decking may use hidden clips; review the manufacturer’s instructions first.
- Remove screws carefully. Use the correct bit at low speed. If a screw will not turn, drill through its head, lift the board away, and remove the shaft with pliers. Do not pry aggressively while screws are still attached.
- Pull nails with controlled pressure. Use a cat’s paw or nail puller with a scrap block underneath to protect the joist. Place every removed fastener in a container.
- Cut badly damaged boards into sections between joists. Set the circular saw blade about one-quarter inch deeper than the decking so it does not cut deeply into the joist, and unplug the saw or remove its battery while adjusting it.
- Pry boards up gradually. Place the pry bar over a joist and lift along the board. Never brace it against siding, trim, or railings, and protect the flashing, since damaged flashing can let water reach the wall or framing.
- Keep fingers clear. A board can release suddenly after the last fastener is removed.
- Clean and reinspect the joists. Pull leftover nails, screws, and staples, then probe the framing. If several joists, the ledger, beams, or posts are damaged, do not install new boards until the structure has been evaluated.
Never burn pressure-treated boards, and follow local disposal requirements for treated wood and composite decking.
How Do You Measure and Cut Replacement Deck Boards?
If you uncover widespread rot, unstable framing, or damage around stairs and railings, stop before installing new boards. AllFix handyman services can help homeowners, landlords, and property managers in Grant, Adams, and Spokane Counties evaluate deck damage and plan the right repair.
Measure each opening and match the boards
Do not use a damaged board as a template. Measure each opening at both ends and in the middle, and label each replacement board. Measure the actual width and thickness instead of relying on the label; a nominal 2-by-6 will not measure exactly 2 inches by 6 inches. Preserve the existing overhang, since a board that extends too far can become a trip hazard, while one that ends short may leave framing vulnerable to moisture.
Plan gaps, butt joints, and seams
Leave gaps so rain can drain and boards can expand or contract, following the product requirements; composite products may set separate side, end, and butt-joint gaps. Both ends at a butt joint should rest on a joist or properly installed blocking, with room for each board’s fasteners. Stagger seams instead of lining them up across the deck.
Cut, seal, pre-drill, and dry-fit
Choose straight boards free from deep cracks and decay, support both sides of the cut, and use a jigsaw for notches around posts. For pressure-treated decking, apply a compatible end-grain sealer to cut ends when the product instructions recommend it. Pre-drill near board ends to reduce splitting. Finally, dry-fit each board with spacers, checking length, gaps, overhang, and surface height. If it rocks or sits high, inspect the joist tops for debris or damage.
How Do You Install New Wood or Composite Deck Boards?
Wood may shrink as it dries, while composite boards often require specific clips, screws, spacing, and cutting methods. If you find widespread rot, loose framing, or movement, arrange deck repair services from AllFix before covering the structure with new boards.
Match the layout and material requirements
Install replacement boards in the same direction as the existing decking. If you are changing from wood to composite, confirm that the joist spacing meets the product requirements, since some composite systems need closer support. Do not force a wet pressure-treated board tightly into an opening, since it may shrink as it dries. For composite decking, use only the clips and screws approved for that product; mixing brands can cause uneven gaps, loose boards, or warranty concerns.
Fasten securely and keep gaps consistent
Use spacers to keep gaps consistent. Use exterior-rated fasteners approved for treated wood, and avoid indoor drywall screws or hardware with unknown coatings. Drive face screws flush without overdriving; test the clutch setting on a scrap board first. Each board should rest on framing at both ends, and butt joints need solid support beneath both boards.
Protect the framing and check your work
Joist protection tape can help shield joist tops from water entering through screw holes. Add treated blocking where a board end lacks support, and repair damaged joist tops first; do not cover compromised framing simply because the new decking is ready. After placing several boards, check alignment, spacing, and surface height with a level. For larger framing concerns in Grant, Adams, or Spokane County, AllFix deck repair services can help assess the structure before the surface is rebuilt.
How Do You Finish and Maintain the Repaired Deck?
Wood decking may need sanding, end-grain protection, and a compatible coating, while composite decking usually needs cleaning and inspection instead.
Smooth and finish new wood
Trim uneven ends, then use approximately 80-grit sandpaper on the replacement board and transition to remove rough fibers and mill glaze. Wear eye and respiratory protection when sanding. Let pressure-treated lumber dry before staining; many deck professionals recommend waiting about two weeks, but the finish manufacturer’s instructions should take priority. If water beads heavily on the surface, the wood may not be ready. Test the finish in an inconspicuous area first.
Follow manufacturer guidance for composite decking
Do not apply wood stain, paint, or sealer to composite decking unless the manufacturer specifically approves it. These products can cause discoloration, create a slippery surface, or affect the warranty. Avoid aggressive pressure washing.
Keep up with inspections and maintenance
Walk the repair and fix raised fasteners, sharp corners, and uneven boards. Sweep debris regularly and investigate persistent puddles. Inspect boards, fasteners, stairs, railings, and framing at least twice a year, ideally in spring and fall. Recoat wood decking when it no longer repels water, and never apply a new coat over dirt, mildew, or damp wood.
Call AllFix when damage extends beyond the deck boards
A professional inspection is a better choice when you find soft joists, damaged beams, rotted posts, loose ledger connections, unstable railings, or widespread decay. AllFix helps homeowners, landlords, and property managers in Grant, Adams, and Spokane Counties with broader deck and property repair needs. Contact the team about handyman services when a project involves more than a few boards, or ask about remodeling services when it includes stairs, railings, structural updates, or related exterior improvements. AllFix serves Moses Lake, Ephrata, Quincy, Othello, Soap Lake, Warden, and nearby communities.
Related Articles
Frequently Asked Questions
How can I tell whether a deck board needs replacement or only maintenance?
A faded or gray board may still be sound. Replace it if it feels soft, crumbles when probed, has deep splits, severe cupping, pest damage, or creates an unsafe walking surface. Solid boards with minor surface wear may only need cleaning, sanding, or a compatible finish.
Can I replace deck boards if the framing underneath is damaged?
No. Inspect the joists, beams, posts, ledger, blocking, and fasteners before installing new decking. Rot, movement, sagging, loose connections, or water damage should be repaired first because new boards cannot stabilize a weak frame.
Should replacement deck boards match the existing material?
Ideally, yes. Match the board’s material, thickness, width, profile, and fastening system. Wood and composite decking have different requirements for spacing, cutting, and hardware, so do not assume that fasteners or installation methods can be mixed.
When should I hire a professional deck repair contractor?
Professional help is recommended when the deck moves, pulls away from the home, has widespread rot, or includes damaged stairs, railings, posts, beams, or ledger connections. AllFix provides deck and handyman repairs for properties in Moses Lake, Ephrata, Quincy, Othello, Soap Lake, Warden, and nearby communities in Grant, Adams, and Spokane Counties.
Tell Us About Your Project
Fill out the form below and we'll contact you within 1 business day.